Carter Thermoquad Rebuild

By Bill Cooke


    If you have ever had to work on one of these carbs you know why they are not exactly well loved. If the metering rod adjustment screw isn't enough to scare the daylights out of you there is always that plastic body. Most people will opt for a different carb altogether but this isn't an option for some people. Besides with a little hard work you can make a fairly decent carb out of it. All in all it's not the worst carb out there.

     Once you've determined you're sticking with the ThermoQuad, a rebuild is the next logical step. However, this thing has a few items that will make the rebuild a little trickier than most. If you are unfamiliar with the adjustment procedure, working on the Thermo-Quad can become a very long day indeed. Follow along and we'll take you through it step by step.

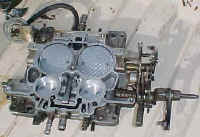
Carter Thermo-quadFrom the outside, it appears to be just another carb. Well, that's about right. It is very similar to the Quadra-jet in many ways. The big difference is the two floats, the lack of secondary metering rods and the primary metering rod adjusting screw. Oh, and the PLASTIC BODY!

Remove all the screws and linkages and remove the air horn assembly from the carb. Be very careful not to bend the metering rods or anything else for that matter. Check the body of the carb to make sure it's not warped. Any little problems can be fixed with a sheet of 100 grit sandpaper and a flat surface. Just rub the top of the plastic body of the carb until it's flat again. If it's really bad, maybe it's time for a new carb. Pick up the paper and you'll find these little gems all over the place, usually 10 for a dollar! Those poor saps don't know what they have!
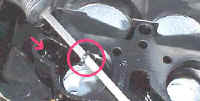
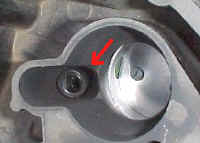
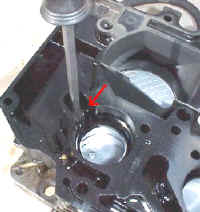
Here is the number one cause for problems with the Thermoquad. It's this little seal at the bottom of the venturi tube pick-up. When this starts to leak it lets fuel go straight down the carb and floods the engine. A lot of people have thrown this carb away thinking it had gone bad when all it needed was a stupid little seal.


Here's a good shot of where this little bugger lives. It can be a bit tricky to get it in right and it has to be in right. Do not move or shake the body after you have the seal in place before you install the airhorn (top of the carb).

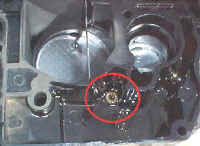
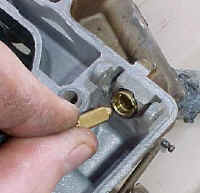
This is one of the metering jets. There is an identical one on the other side of the carb. I fact almost every part on this carb has a twin on the other side. The exception in the accelerator pump, only one of those. Changing the jet size will effect the air/fuel ratio. Larger jets let more fuel pass and smaller ones the opposite. Now it's backwards with the metering rods. Larger rods lean out the carb and smaller ones richen the mix. This carb is also adjustable so you can fine tune the mixture later. That fact alone makes this a worthy carb. In high altitudes you can just lower the metering rods to thin the mix. More on that later...

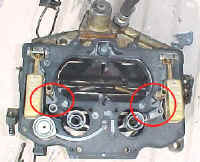
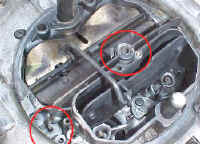
Here's a good picture of the upside down airhorn. You can see all the guts from here. Almost all the parts in the Thermoquad are right in the airhorn and that can make it pretty easy to work on. The circles are pointing out the whole fuel delivery system of the carb. The lower tubes are the primary venturis and the upper are the secondary pickups. That little itty-bitty rod in the middle is the metering rod. Be very careful with those. They are hard to come by and a little too easy to bend. In fact, getting them back in the carb is the hardest part of the whole job. More on that later too...

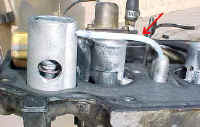
If you mess this one up, you're in big trouble. This is the transfer tube for the accelerator pump. If you get the carb back together and it seems to idle fine but stalls every time you hit the gas, this is most likely the culprit. Do not crimp, cut, or otherwise damage this tube! Make sure it's on all the way and has no obvious leaks. Other than that it's no big deal.

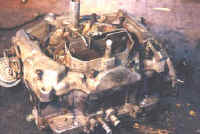
Here's the baseplate-throttle body. Check to make sure your throttle shafts aren't too worn out and get every nook and cranny clean! I don't care what the outside looks like, get the inside clean! You can also see the ramp that actuates the metering rods. Don't lose it or let it get jammed when you put the body back on the base. Make sure everything is still moving freely before you put the carb back on the engine. Once is enough for this job.

This is a no-brainer but I thought I'd show it to you anyways. This is the needle and seat. It's in the back of the airhorn and has a twin on the other side. CHANGE THEM! Also blow out the tubes leading up to them to make sure there isn't any junk in there that will cause problems later. Set your float height according to the instructions in your rebuild kit. Most require that the gasket be in place to get the measurement and there is a difference between the plastic and brass floats. Brass floats better so the level is higher. For off-roading you can set the levels 1/32" or more lower (higher number) to keep from having fuel slosh. That isn't too big a problem for this carb but a little insurance is nice.

Getting the metering rods back in is a pain. I found it easier to remove them from the carb before reinstalling the airhorn. That way you can't bend them accidentally. Remove the little covers on each side of the carb and slide out the rods. After you have the top back on your cab, remove the hold down from the top of the metering rod assembly and lift it up. This gives you room to get the rods back in easily. Reinstall the hold down and the  side covers and bolt on the carb.

Now on to adjustments, here's where you will be spending all you weekends from now on. Once you get used to setting the metering rod height you won't be able to stop. It's just so much fun and easy as can be. Just don't get too carried away. If you have rebuilt the carb correctly then small adjustments are going to make a big difference. Clockwise richens the mix and counter-clockwise leans. This raises and lowers the metering rods in the jets and increases or decreases fuel to the engine. In higher altitudes you should turn it about a 1/4 turn for ever 1,000 feet or so. This is not an exact science as all engines are a little different and will need more or less fuel at different points. If you have been turning this screw with little or no effect and you're sure the carb has been built right, it's time to swap jets or rods. Rods are easier as they can be done with the carb on the engine. Go with smaller rods to richen the mix and larger rods to lean.

I hope this will help you with your carb problems. As with most parts on a Dodge, it can be a bit frustrating trying to get good info about them but once you understand how they work, you're set! These are good everyday carbs and offer a few great feature we off-roaders can really use. Now get out there and rebuild that thing!